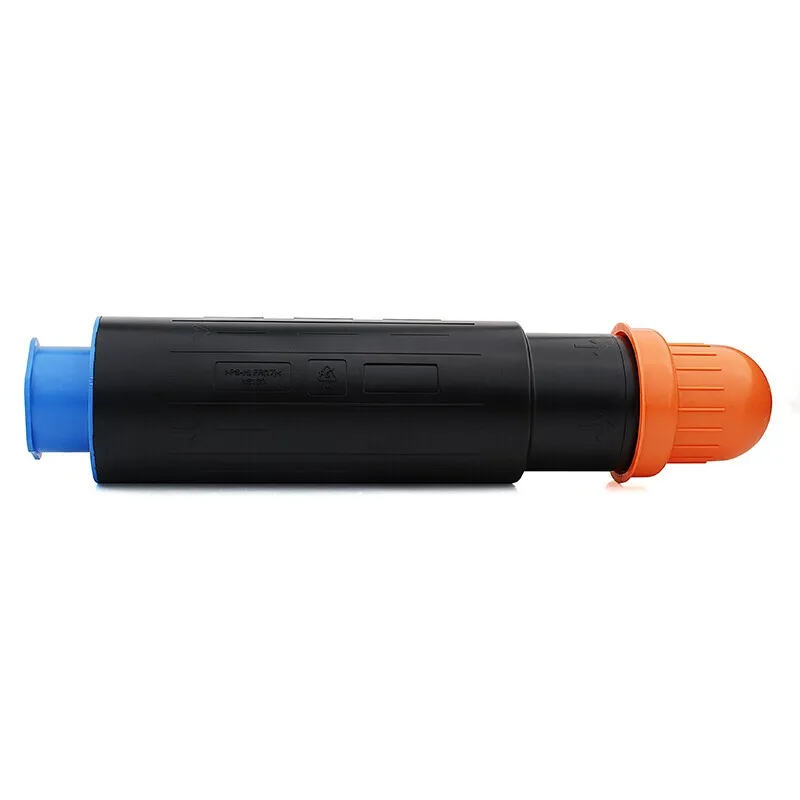
Even if a copier or laser printer receives an alert for shipments of compatible tones, it may still display the message "toner replacement or cartridge recognition.". Perhaps the issue is with that toner, not with how the reset gear should be positioned. Once the cartridge has been identified, the machine can be re-energized and returned to its factory settings.
To learn about the cartridge reset procedures for particular models such as Brother, Lenovo Konica Minolta and Toshiba Toner, refer to this instruction manual. Only the toner cartridge designs are considered in these procedures, as they contain information about the reset gear and its location. All other items must be returned once. To prevent damaging the gears, spring, or side cover, it is recommended to tighten the cartridge and operate it slowly before starting.
This reset method applies to the following printer and copier models:
The cartridge may use either a two-corner reset gear structure or a three-corner reset gear structure. The correct procedure depends on the gear design of the cartridge.
First, remove the two screws securing the side cover on the gear side of the toner cartridge. Carefully remove the side cover to expose the internal gear assembly.
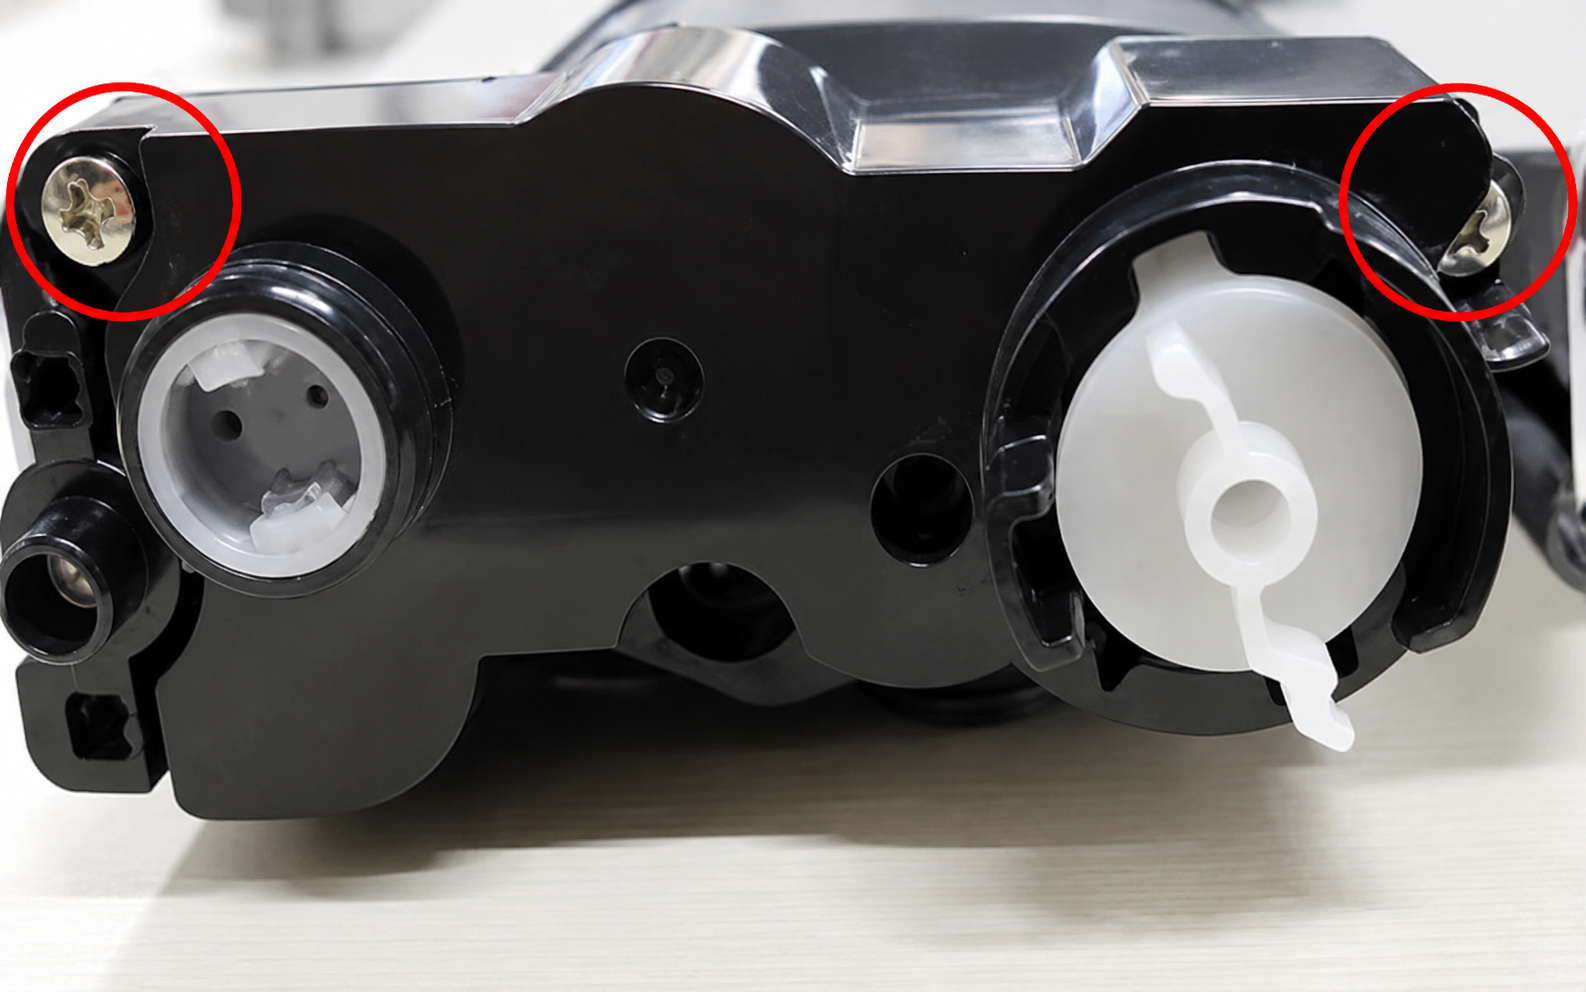
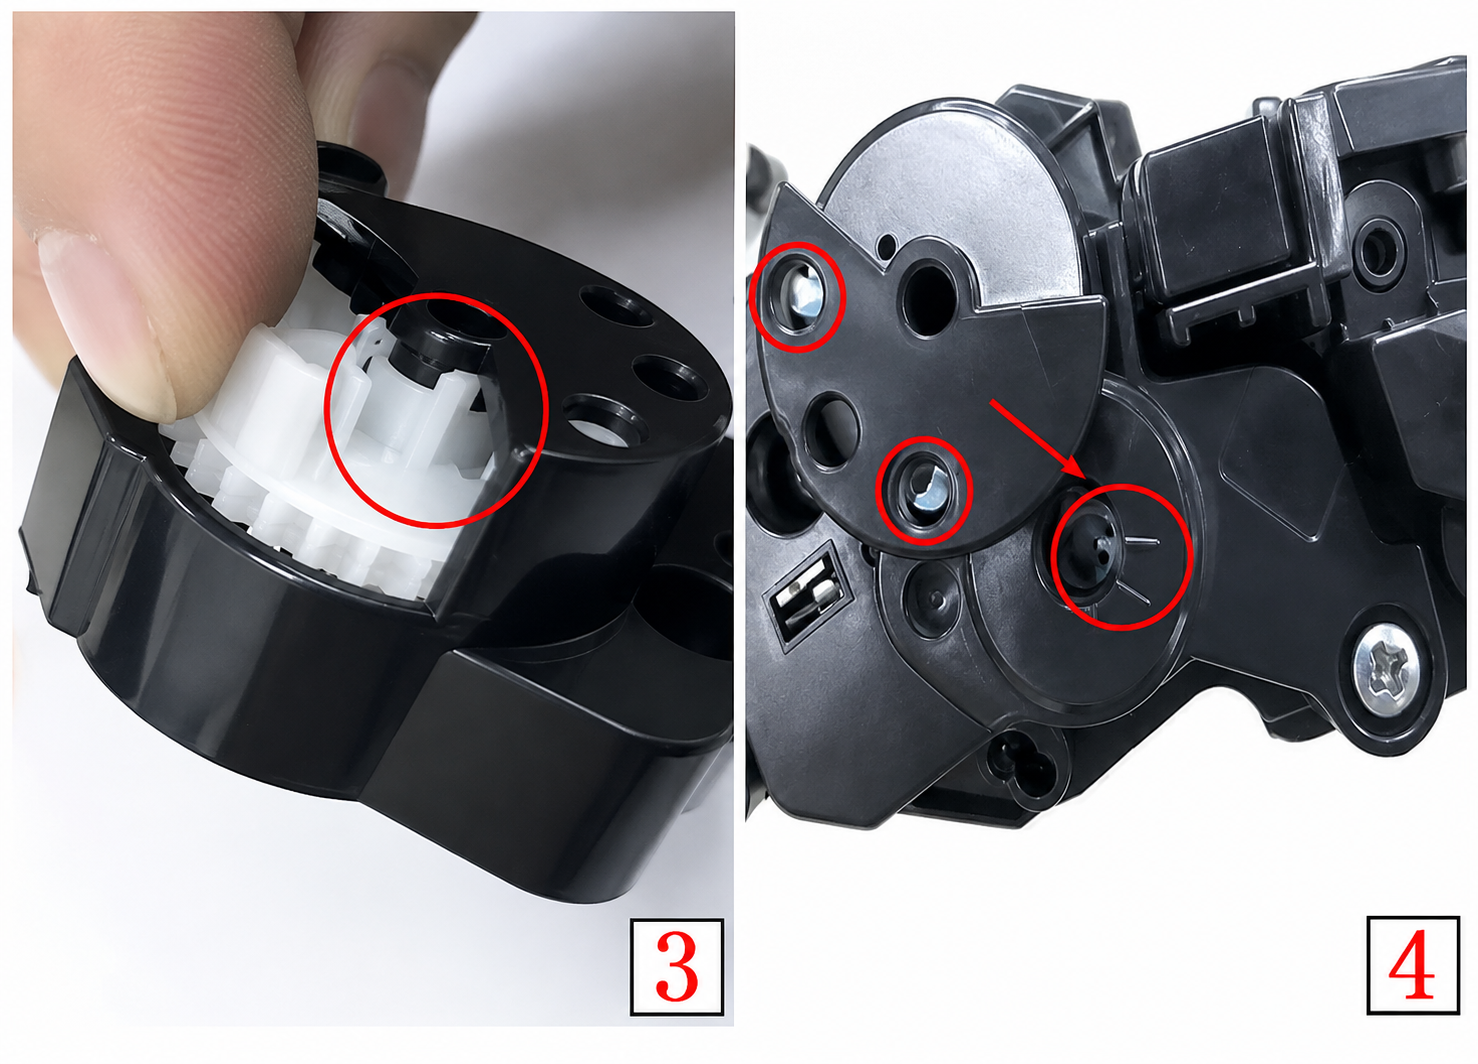
Next, position the small protrusion on the toner mixing gear toward approximately the 4–5 o'clock position. At the same time, correctly position the limiting spring or torsion component according to the original configuration.
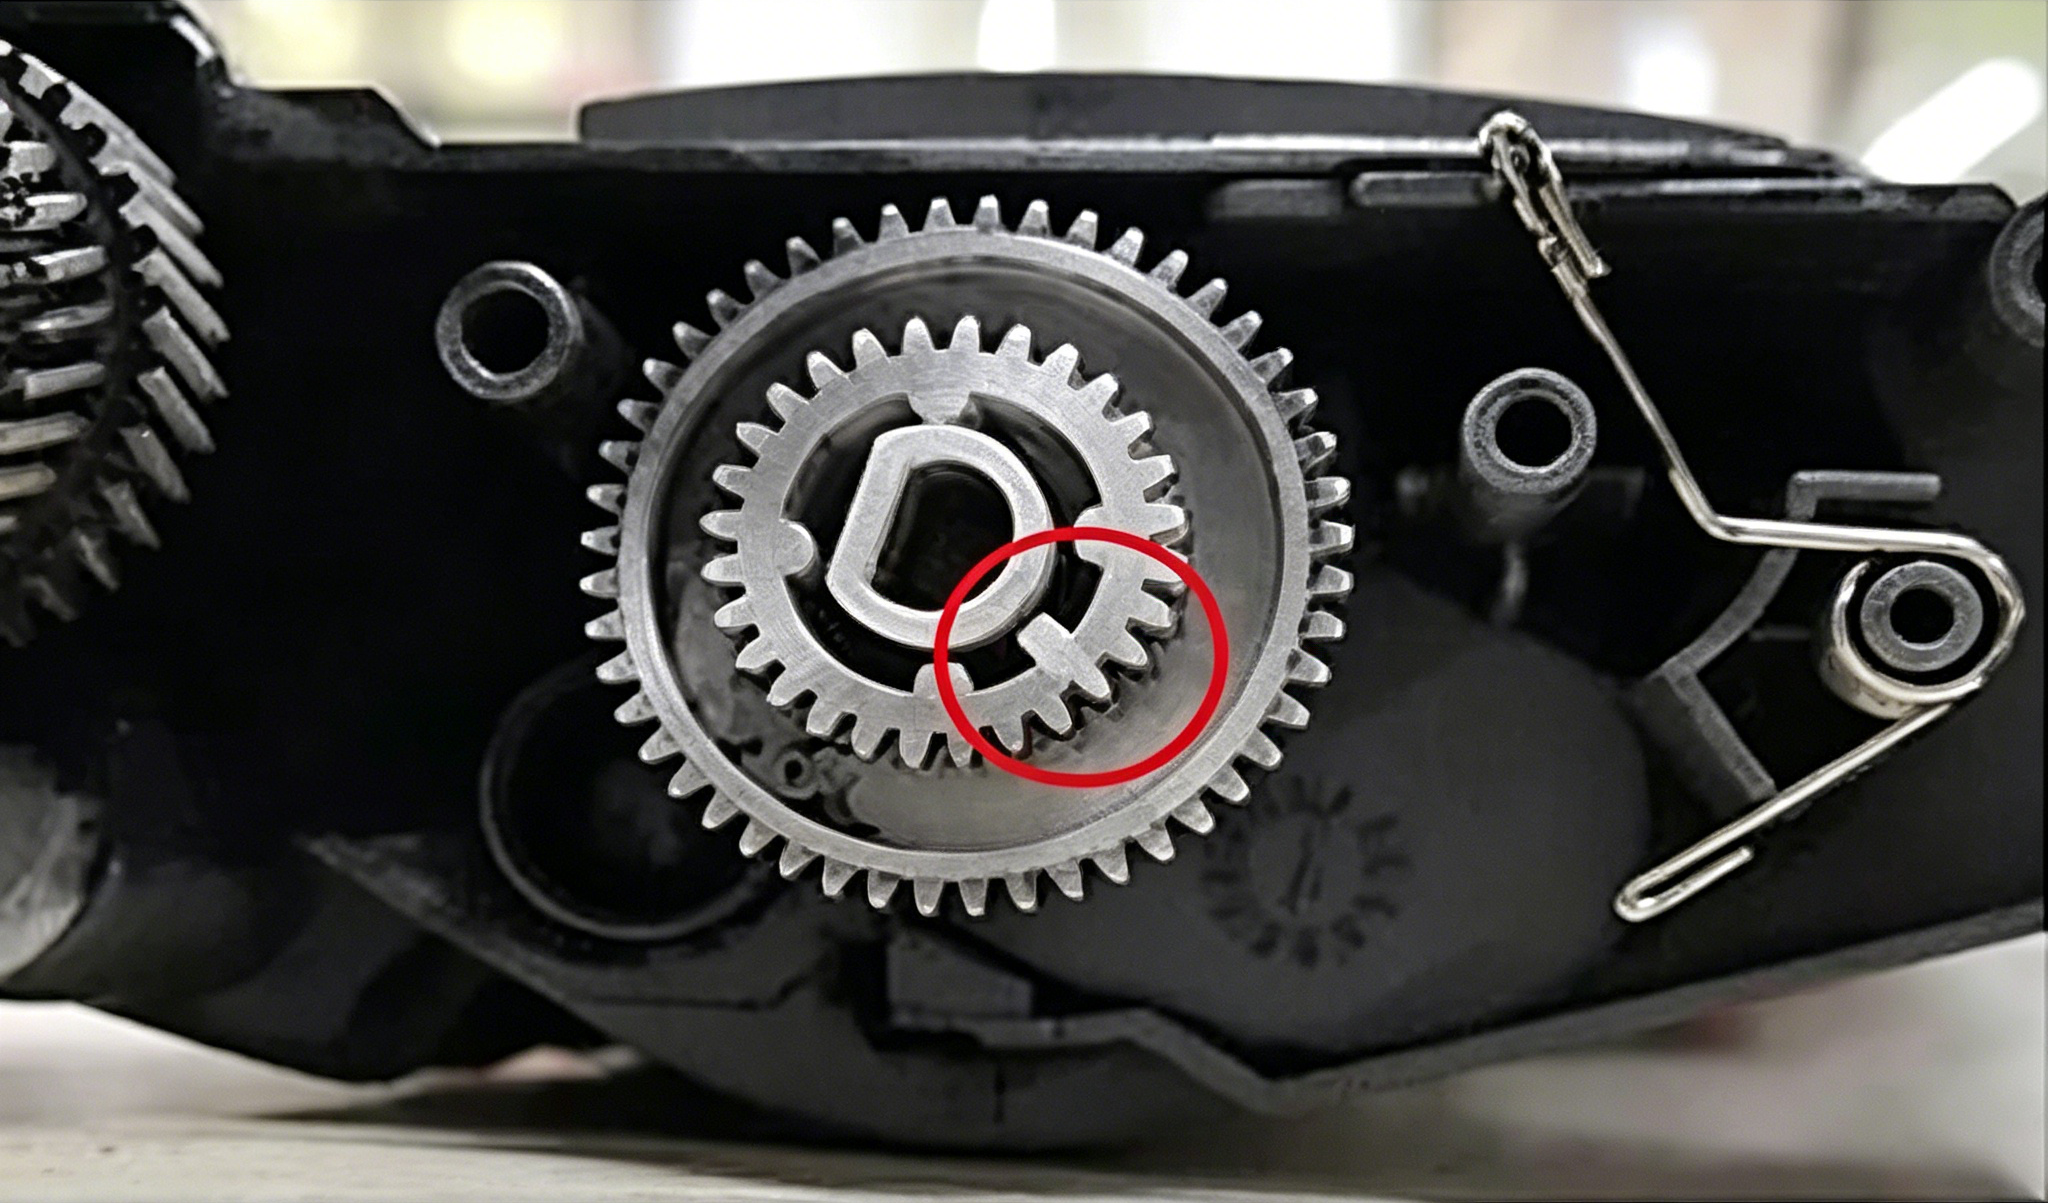
Slightly push the longer arm of the torsion component outward. Then install the reset gear into the correct position. Pay close attention to the small short tooth on the reset gear. Its position should match the position shown in the reference image.
After positioning the reset gear, reinstall the transmission gear and side cover. Once the components are correctly installed, the reset gear should return to the required starting position.
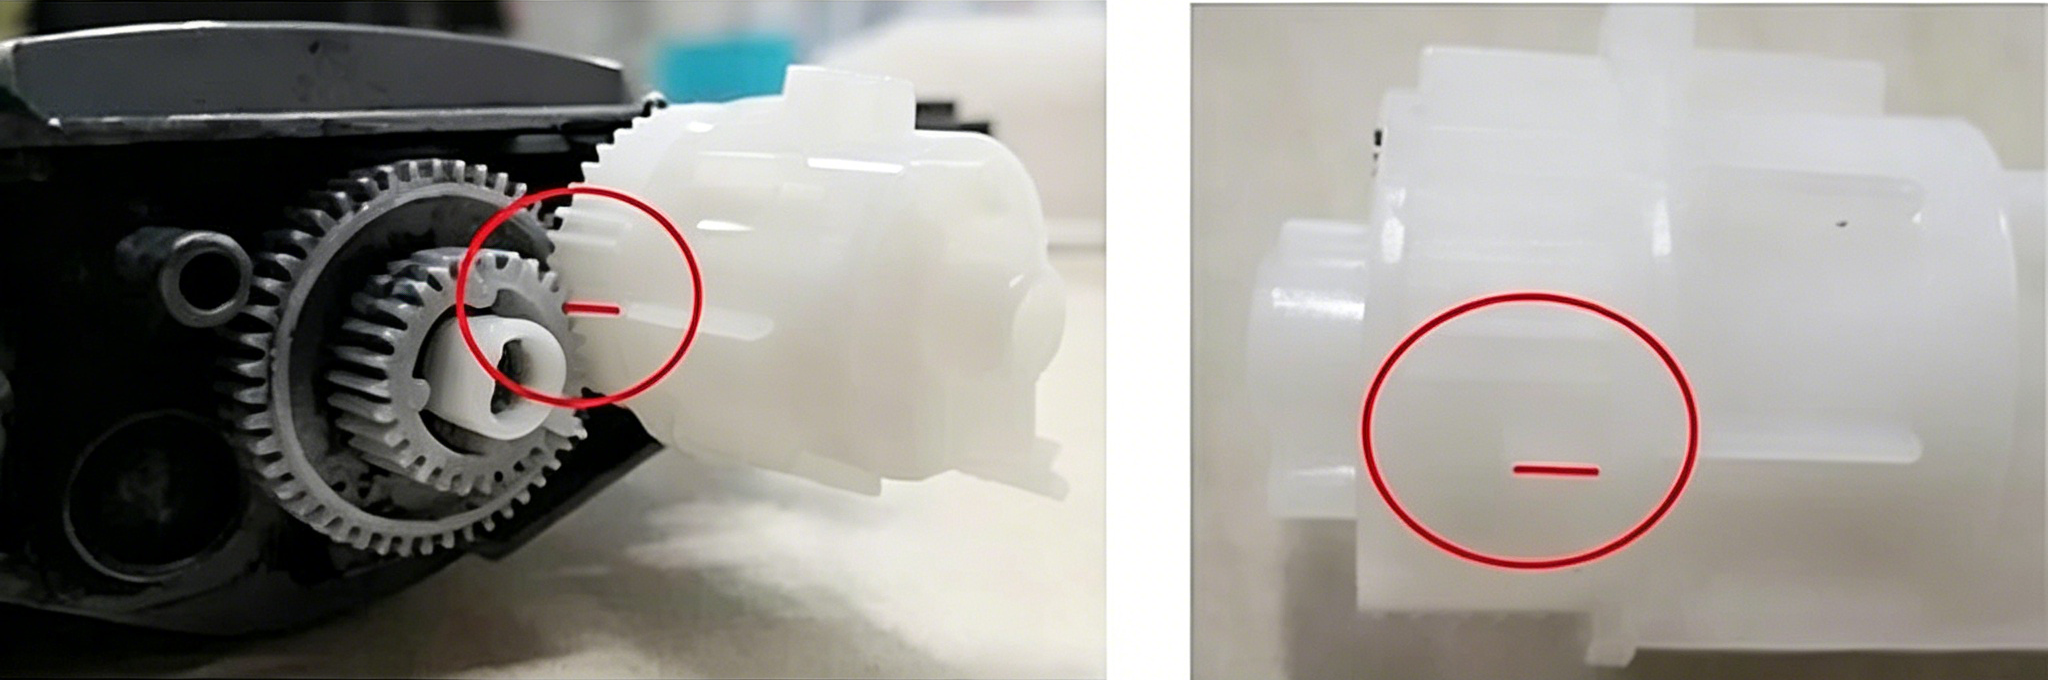
The position of the small tooth is particularly important because an incorrect gear position may prevent the cartridge from being properly recognized by the printer or copier.
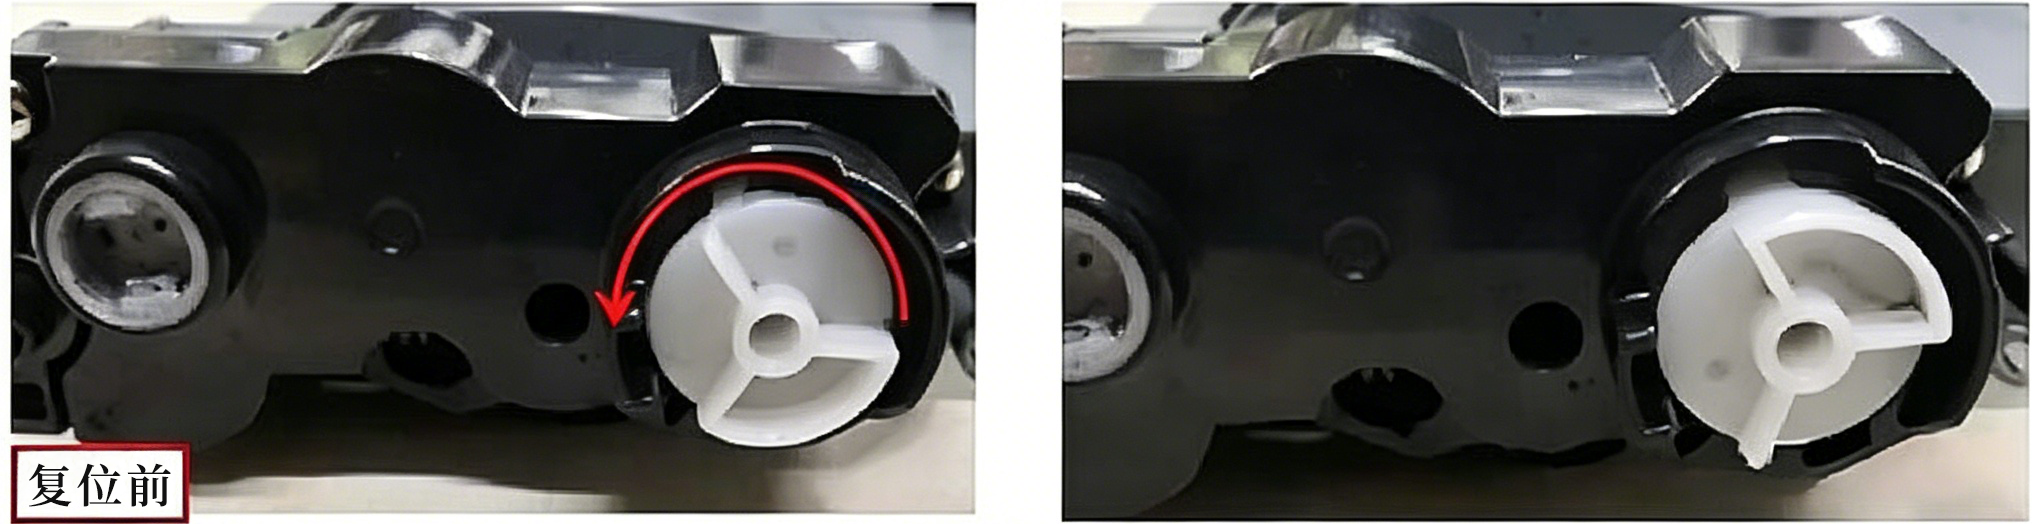
For cartridges using the three-corner reset gear structure, rotate the reset gear counterclockwise until it reaches the position where it can no longer turn.
According to the original gear positioning method, the single edge is moved from approximately the 11 o'clock position to the 7 o'clock position by rotating the gear counterclockwise.
If the first attempt does not achieve the expected reset position, repeat the rotation procedure several times while checking the gear position carefully.
The Brother TN2425 reset method is different from the gear structures described above. It is applicable to the following models:
The reset procedure mainly involves the conductive-side cover, transmission gear, reset gear, and spring. Correct alignment of these components is essential for successful cartridge resetting.
First, remove the side cover on the conductive end of the toner cartridge. Then rotate the transmission gear on the toner cartridge until its middle section reaches the position indicated in the reference image.
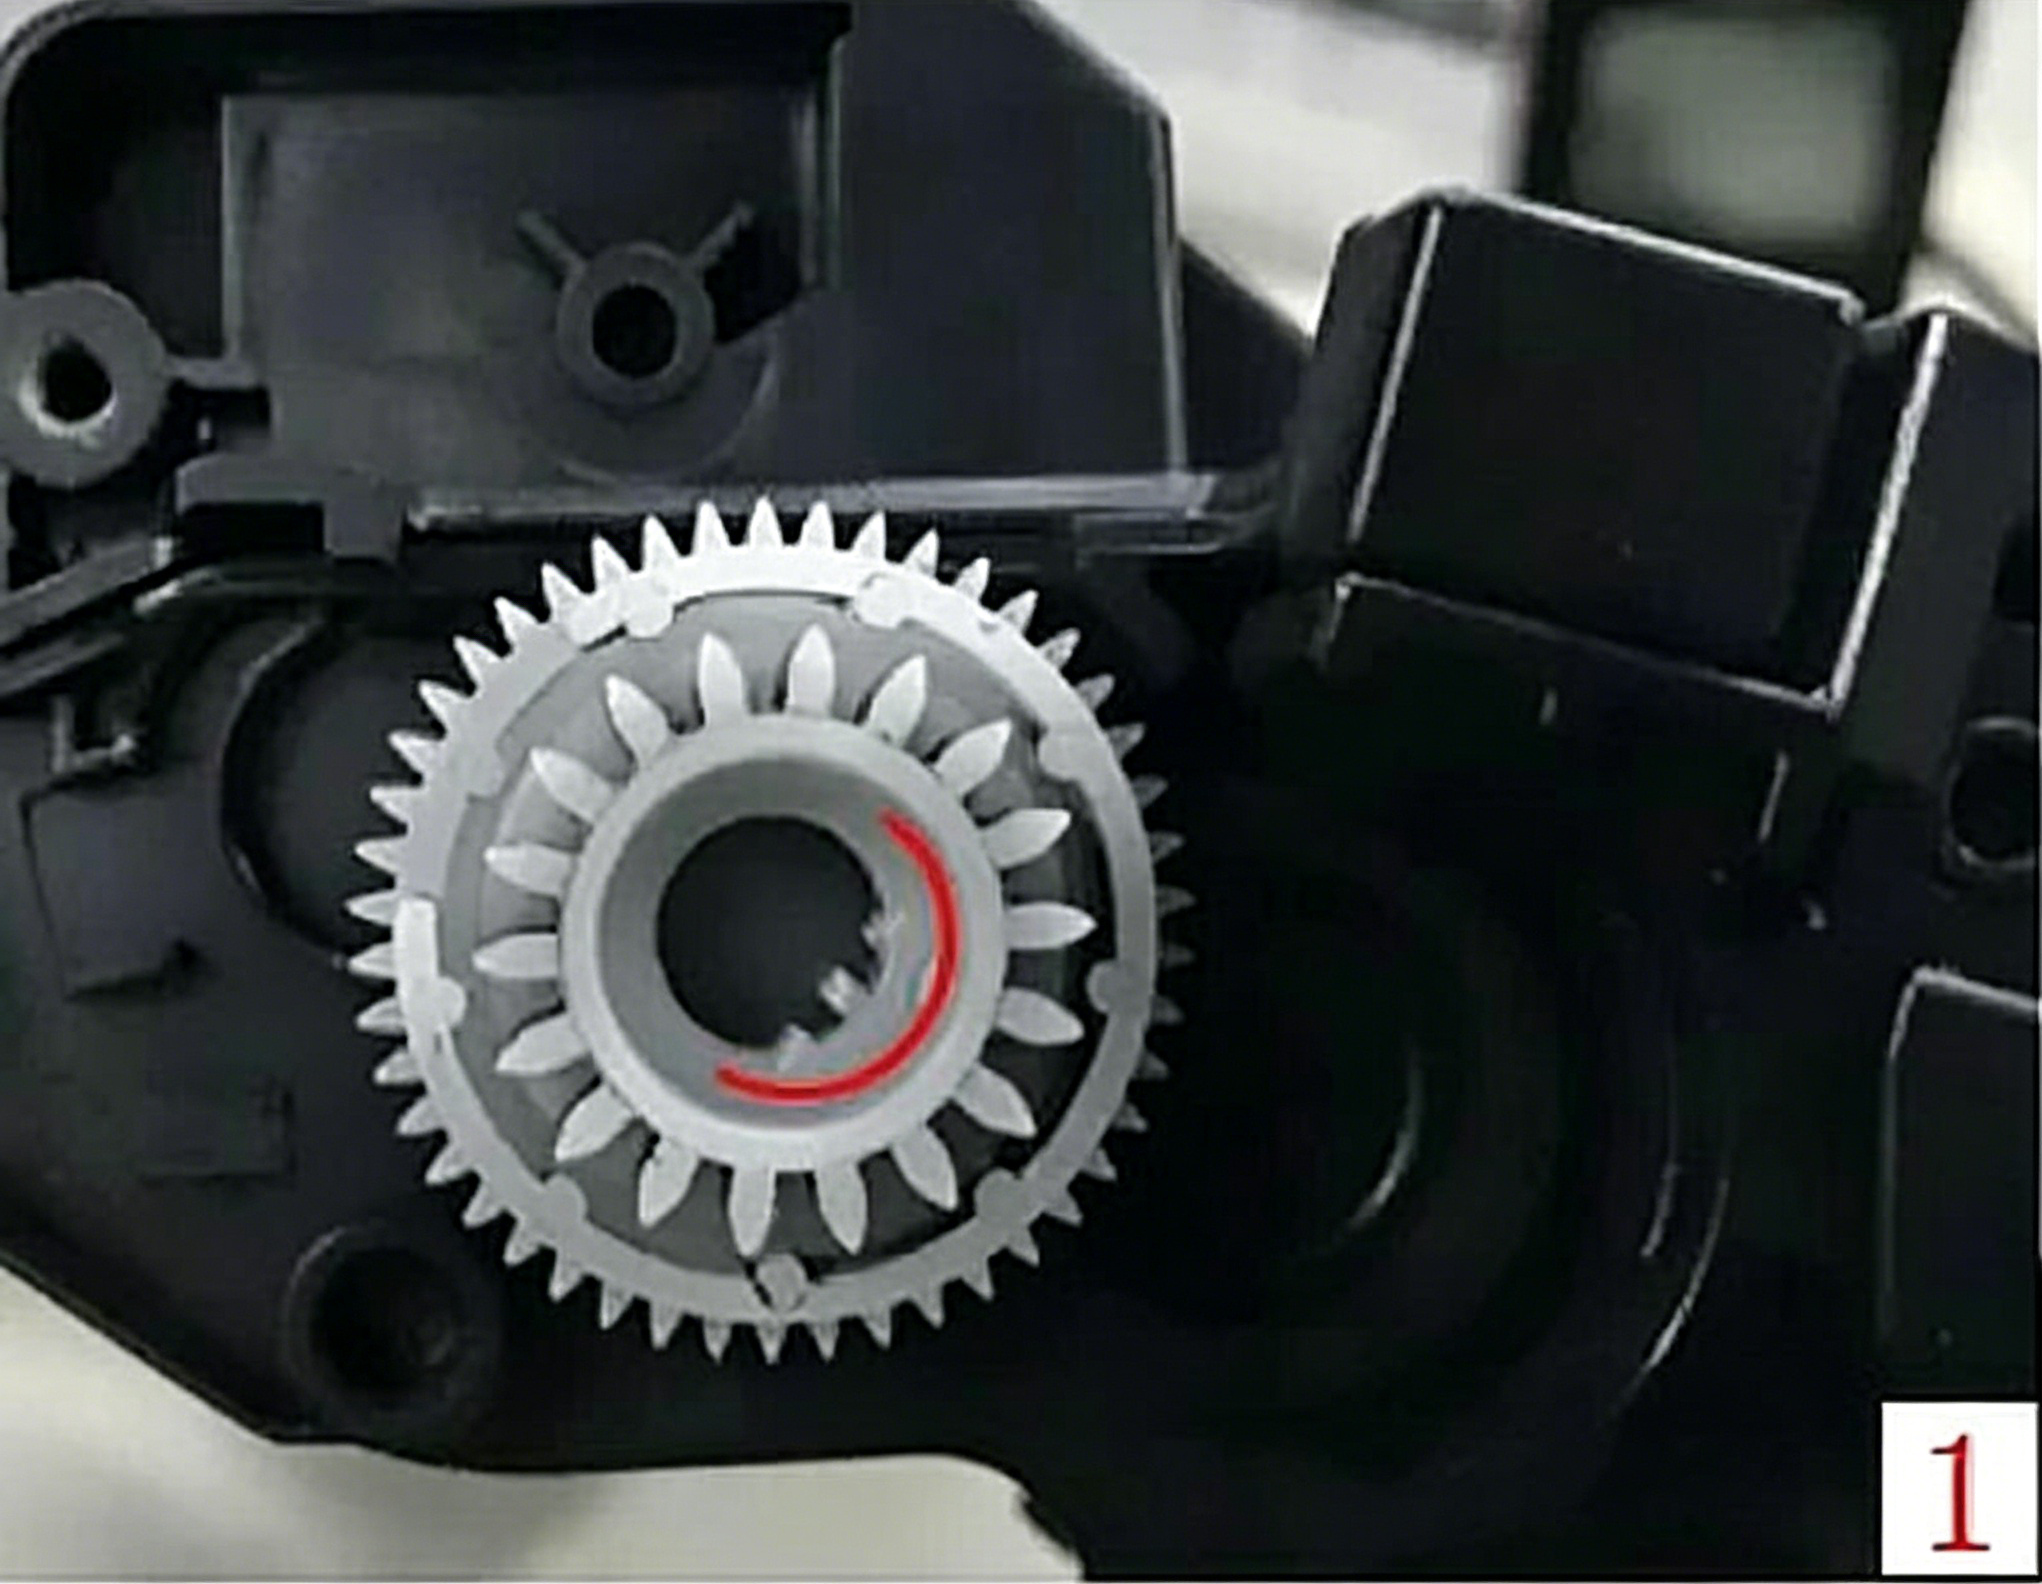
Next, adjust the cross-section of the reset gear on the side cover to the required position. Pay particular attention to the spring. The spring should be installed correctly and remain securely in its intended position.
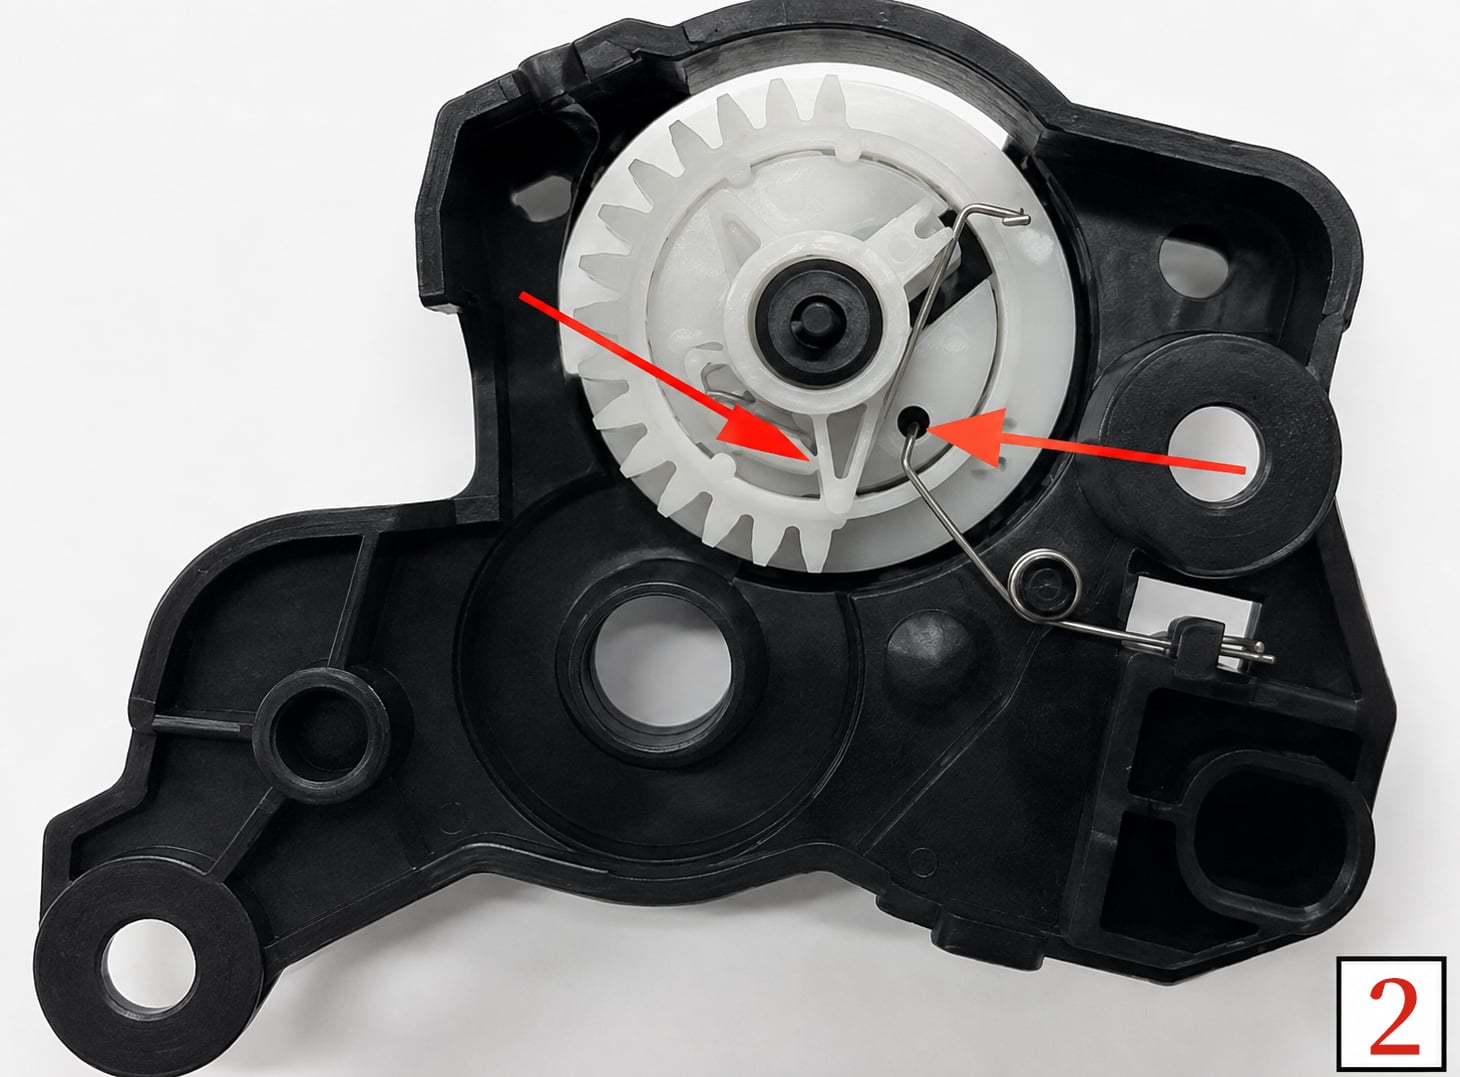
After installing the spring, gently rotate the reset gear slightly counterclockwise from the outside of the side cover. Hold the reset gear in the correct position while reinstalling the side cover.
Once the side cover has been installed, check the alignment carefully. The opening on the transmission gear should align with the corresponding opening on the side cover. At the same time, the two small protrusions on the reset gear should align with the two corresponding holes on the side cover.
The reset process is mainly a matter of accurate gear positioning and correct component alignment. Before reinstalling the side cover, check the position of every gear and spring carefully. A small deviation in the reset gear can affect the cartridge's reset function.
For cartridges with a torsion component or spring, avoid forcing the part into position. The spring should remain properly seated, while the gears should rotate smoothly without excessive resistance. When reinstalling the side cover, make sure the gear openings and locating points are aligned before tightening the screws.
For compatible toner cartridges, proper reset gear positioning is an important part of cartridge installation and preparation. A cartridge may contain sufficient toner but still require the reset mechanism to be correctly positioned so that the printer or copier can recognize the cartridge's new operating state.
For distributors, wholesalers, technicians, and copier service professionals, understanding these reset procedures can make cartridge installation and after-sales support more efficient. It can also help reduce unnecessary cartridge replacement when the problem is related to the reset mechanism rather than toner quality.
Before installing the reset cartridge into the printer or copier, check the following points:
Correct preparation can help improve cartridge recognition and reduce installation problems.
Resetting a toner cartridge does not always require replacing the entire cartridge. For compatible cartridges using specific reset gear structures, carefully adjusting the gear position and reinstalling the side cover correctly can be an important part of the installation process.
The methods covered in this guide include reset procedures for Brother TN2225, Brother TN2425, Lenovo LT2441H, Lenovo LT2641H, Konica Minolta TNP29, and Toshiba T-2400C cartridge structures, along with their corresponding compatible printer and copier models. Always follow the correct procedure for the specific cartridge structure and carefully check the gear and spring positions before installation.
 Hot News
2026-08-19
2026-08-12
2026-07-30
2026-07-24
2026-07-21
2026-07-11
Guangzhou SC Office Equipment Co., Ltd specializes in high-quality, Japan-compatible copier and printer consumables since 2009. Discover reliable toner cartridges and imaging solutions.
Building H, Yushu Innovation Park, Science City, Huangpu District, Guangzhou, Guangdong, China
Copyright © 2026 Guangzhou Xinshengchu Office Equipment Co., Ltd. All right Privacy Policy
 EN
EN