

Основната улога на тонерот
Што е тонер за печатало?
Тонерот има клучна улога во ласерските штоперки со тоа што го пренесува тонерот на хартијата каде што му е местото. Замислете го тоа како мост помеѓу она што е на екранот и она што физички се отпечатува. Повеќето тонери имаат цилиндричен облик и се покриени со специјален светлосен материјал. Тој слој е важен, бидејќи без него тонерот не би можел да работи со електричните полнежи потребни за отпечатокот. Секој пат кога некој ќе притисне печатење, овие компоненти работат зад сцената за да осигураат дека сè излегува како што треба.
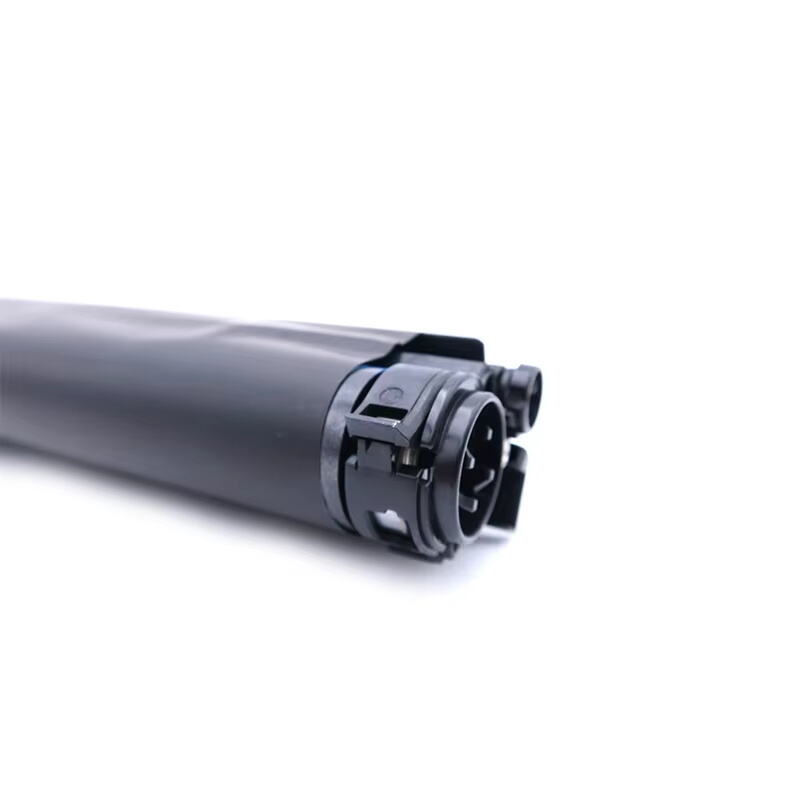
Тонерите доаѓаат во различни форми за штоперки, главно интегрирани и одделни модели дизајнирани за одредени машини. Интегрираниот тип го става фотосензитивниот тонер внатре тонер чевчеж , што го прави многу лесно кога ќе дојде време за замена. Сепак, работат поинаку бидејќи бараја замена само на барабанот одделно од тонерот. Иако ова може да изгледа како дополнителна работа, многу корисници сметаат дека одделните барабани всушност штедат пари со текот на времето бидејќи не мора да се заменуваат двата компоненти истовремено.
Животниот век на еден тамбаска единица може значително да варира во зависност од употребата и спецификациите на производителот, обично од неколку илјади до десетици илјади страници. Разбирањето на овие разлики е клучно за изборот на правилниот компонент за вашите печатни потреби.
Основна функција во процесот на електростатичко печатење
Електростатичното печатење има клучна улога во тоа како се креираат сликите, а единицата барабан е сосема неопходна за тоа процесот да функционира. На почеток, површината на барабанот се полни еднакво низ целата површина, што всушност ги подготвува сите компоненти за тонерот да влезе во игра подоцна. Кога започнува печатењето, ласерот работи по површината делови на барабанот. Ова создава нешто што претставува електростатична карта која прецизно одговара на она што треба да се прикаже како текст или слики.
Откако ласерот ќе го изреже желниот дизајн, нанесуваме тонер кој носи спротивен полнеж. Овој тонер се лепи за деловите од барабанот кои биле неутрализирани од ласерското дејство. Кога хартијата дојде во контакт со овој наелектризиран барабан, таа го влече тонерот на себе за да го формира всушност изображението. Барабанот има доста важна улога во тоа колку финалниот печат ќе изгледа добро. Ако барабанот не функционира правилно, тоа може сериозно да влијае на јасноста на текстот и изображенијата. Затоа производителите поминуваат толку многу време тестирајќи ги овие компоненти пред да ги испратат принтерите до клиентите.
Истражувањата покажуваат дека постои јасна врска помеѓу тоа колку добро се одржуваат единиците на барабаните и континуитетот на квалитетот на печатењето што го произведуваат. Кога овие компоненти се во добро состојба, тие продолжуваат глатко да работат и да испорачуваат јасни слики од работа на работа. Редовното чистење и инспекција прават повеќе од што што ќе подобрат тоа што излегува од принтерот. Тоа всушност го продолжува векот на траење на барабанот пред да биде потребна неговата замена, што има смисла за секој кој сака операциите на печатење да се извршуваат без постоянни прекини или скапи замени на делови во иднина.
Како перформансите на тонерната картичка директно влијаат врз квалитетот на печатењето
Прецизност на тонерниот пренос и формирање на сликата
Добивањето на правилниот трансфер на тонерот прави голема разлика кога станува збор за печатење со добра квалитет. Кога нешто ќе тргне погрешно во овој процес, резултатите обично изгледаат доста лошо. Тука исто така голема улога ја има и тонерната корпа. Ако сѐ функционира како што треба, тонерот се нанесува точно на површината на хартијата, што значи дека ќе добиеме оние убави, чисти слики што сите ги сакаат. Но, што се случува ако корпата не работи добро? Па, проблемите брзо се појавуваат. Можеме да видиме печатење кое е премногу бледо, да има чудни линии низ него или уште полошо, целосно замачкани отпечатоци. Професионалците од индустријата знаат дека дури и мали недостатоци во работата на овие тонерни корпи можат сериозно да го нарушуваат формирањето на сликата, така што линиите стануваат заматени, а текстот нејасен. Повеќето професионалци истакнуваат важноста на редовни прегледи и постапки за одржување за да работи сѐ глатко. На крајот од краиштата, нема начин да се избегне фактот дека точното нанесување на тонерот директно води кон подобро изгледа на отпечатените материјали.
Чести проблеми со квалитетот од деградација на тапата
Кога јазичето започнува да се троши, повеќето луѓе ќе имаат проблеми со печатењето кои ќе бидат доста очигледни на нивните страници. Мислете на работи како досадни ленти низ страницата, чудни привидни слики кои се појавуваат каде што не треба, или пак непоследователно квалитетно печатење воопшто. Јазичето се оштетува со нормалната употреба со текот на времето, но и од разни околински влијанија за кои не секогаш мислиме - премногу влага во воздухот, премногу топли или ладни услови, дури и неправилно ракување при инсталирањето или замената. Сите овие фактори го оштетуваат деликатниот површински слој на јазичето, поради што тонерот има потешкотии да се закачи правилно на хартијата. Според разни статистики од индустријата, доста луѓе всушност имаат проблеми со лош квалитет на печатењето поради тоа што јазичето им има проблеми. Затоа е толку важно редовно да правите проверки. Следејќи ги препораките на производителот и користејќи оригинален делови, навистина може да се спречи овој вид на кварови и да се одржува добар квалитет на печатењето секојдневно.
Симптоми на неуспех на барабанот и пад на перформансите
Видливи дефекти во печатењето и индикатори за грешка
Важно е да знаеме кога барабанот започнува да има проблеми ако сакаме нашите принтери да работат без проблеми. Кога нешто не е во ред, луѓето забележуваат работи како што се бледи печатени текстови, чудни линии низ страниците или замачкани делови каде што тонерот не се закача како што треба. Барабанот има голема улога во правилното пренесување на тонерот на хартијата, така што дури и мали црти или неправилности на неговата површина може да го развалат крајниот резултат. Повеќето луѓе имале прилика да видат долги црни линии кои се спуштаат надолу по документите - тоа обично значи дека површината на барабанот се истрила со текот на времето. Мали црни точки расфрлани низ страницата? Тоа најчесто е остатечен тонер или прашина која се собрала негде во внатрешноста на принтерот. машина . Многу модерни принтери всушност имаат вградени предупредувања кои светат или пиштат кога нешто не е во ред со компонентот на барабанот. Произведувачите дефинитивно ги наведуваат сите овие проблеми како знаменца за проблеми со барабанот во нивните упатства. Поправањето на проблемите на време штеди пари на долги траења и ги прави документите професионални, наместо неловко изгледа.
Дијагностицирање на неисправности на принтерот поврзани со тапанот
Кога нешто не функционира правилно со барабаните на принтерот, постојат неколку едноставни чекори кои најчесто ги поправаат проблемите пред да се појават поголеми трошоци. Првата работа што треба да се направи е да се проверат испечатените страници внимателно, барајќи знаци како бледи области (призма) или темни линии што се движат низ страницата (бандинг). Повеќето модерни принтери се испорачуваат со вградена дијагностика која покажува кодови на грешки кога нешто не е во ред. Не заборавајте да погледнете и самиот барабан - понекогаш заградувањето на прашината или мали пукнатини се појавуваат при поблиску инспекција. Техничките советници секогаш нагласуваат дека е важно сервисните мануали на производителот да бидат достапни во текот на сесиите за отстранување на проблемите. Следејќи го овој основен пристап, најчесто се решаваат проблемите со барабаните доста брзо, што значи помалку заглавување на хартијата и подобар изглед на документите воопшто.
Практики за одржување за оптимизирање на траењето на барабанот
Правилно држење и еколошки аспекти
Работењето со тонер касети бара внимание на детали, особено кога се инсталираат или заменуваат за да се избегне случајно оштетување. Секогаш однесувајте се нежно кон овие делови, бидејќи имаат чувствителни површини кои лесно можат да се поцарапаат или да се трошат. Сакате тонер касетата да трае подолго? Чувајте ја во добри климатски услови. Влажноста е голем фактор тука. Повеќето тонер касети добро функционираат кога воздухот не е премногу сув или премногу влажен, идеално околу 40% до 60% влажност. Температурата исто така е важна, каде што 20 степени Целзиусови до 25 степени се оптимални за повеќето модели. Податоците од индустријата покажуваат дека почитувањето на овие опсези всушност може да ја про должи траењето на тонер касетата за околу 20% подолго од нормално. Следењето на овие едноставни совети за складирање и работа има смисла и економски и практично, осигурувајќи подобро квалитет на печатење со текот на времето и заштеда на пари за замена во иднина.
Процедури за чистење и насоки за употреба
Редовното чистење на единиците на барабаните прави голема разлика за добар капацитет. Основното чистење вклучува благо бришење на тонерот што се насобира и на мрснотијата што се закачува на површината на барабанот. Тоа помага да се избегнат досадните проблеми со печатење што сите сме ги имале - линии што се шират низ страниците или случајни точки што се појавуваат каде што не треба. Повеќето производители исто така имаат некакви правила за употреба. Обично тие ги опфаќаат нештата како колку често се користи принтерот во текот на денот и какви параметри на густина на печатење најдобро функционираат со различни модели на барабани. Многу луѓе што се разбираат препорачуваат барабанот да се почисти темелно околу секои пола година или веднаш по замената на тонер патроната. И не заборавајте како правилно да го држите барабанот при инсталирањето или отстранувањето од принтерот. Применување на премногу сила ќе го износи побрзо од нормалното. Луѓето кои си даваат труд да научат овие совети за одржување вообичаено забележуваат дека нивните принтери произведуваат печатења со подобра квалитета за подолги периоди, без потреба од делови за замена.
Стратегии за замена на единица барабан
Очекуван животен век и време за замена
Познавајќи го траењето на барабаните и кога треба да се заменат, се осигурува квалитетот на печатените материјали. Бројот на страници значително варира кај различни модели на барабани, што доста влијае на графиконот за замена. Некои модели можат да издржат околу 12 илјади страници пред да се појават првите проблеми, додека поефтините можат да стигнат и до 30 илјади страници или повеќе без сериозни проблеми. Кога треба некој да размисли за нов барабан? Обратете внимание на знаци како бледи печатени текстови, неправилни линии низ страницата или случајни точки каде што не треба да има. Повеќето луѓе забележуваат овие знаци точно кога барабанот ќе ја заврши својата корисна употреба. Според индустријските податоци, замената на барабаните во правилниот момент го подобрува квалитетот на печатењето за околу 15 проценти. Тоа значи дека документите излегуваат појасно и изгледаат значително по професионално.
Оригинални производители (OEM) спрема совместливи модули: Клучни фактори за избор
При изборот помеѓу барабани од оригинални производители (OEM) и алтернативи од трети страни, постојат неколку важни работи кои треба да се земат предвид. Производителите ги конструираат OEM барабаните специјално за нивните копир машина, што значи дека тие совршено се вклопуваат и обично се со некаква гаранција за перформансите. Повеќето луѓе сметаат дека тие се доста сигурни за користење, иако треба да се признае дека нивната почетна цена е доста висока. Барабани од трети страни им нудат на компаниите евтина алтернатива, без притоа премногу да се жртвува перформансата, а според некои извештаи, понекогаш може да биде и подобра од OEM производите. Но, постојат и недостатоци – проблеми со гаранцијата кои повремено се појавуваат и можеби непоследователното квалитет на печатење помеѓу различни серии. Според неодамнешни истражувања објавени во еден голем печатен труд, околу две третини од компаниите остануваат со OEM барабани бидејќи тие знаат точно што добиваат кога станува збор за квалитет и колку добро сите компоненти функционираат заедно. Сепак, скоро половина од компаниите се одлучуваат за евтината опција, и покрај можните проблеми кои може да настанат подоцна. Пред да се донесе било каква одлука за замена на барабани, компаниите сериозно треба да ја разгледаат нивната стварна потреба за печатење и финансиските ограничувања.
За да истражите опции за компатибилни драм јединици, размислете за контакт со почитани производители од трета страна кои нудат задоволителни гаранции и осигурања за квалитет.
Често поставувани прашања
Кои се знаците што покажуваат дека драм јединицата треба да се замени?
Знаци што драм јединицата треба да се замени вклучуваат блед печат, линии, точки на документите и индикатори за грешки на принтерите кои предполагаат проблеми со драмот.
Како правилната поддршка влијае врз траењето на драм јединицата?
Правилната поддршка може значајно да го продолжи векот на траење на драм јединицата со тоа што ќе осигури површината на драмот да остане слободна од остатоци од тонер и мрви, спречувајќи дефекти во печатењето.
Кои се најдобри услови за оптимална перформанса на драм јединицата?
Оптимални услови за работа на тонер картиџите се влажност помеѓу 40% и 60% и температура од 20°C до 25°C.
Која е разликата помеѓу OEM и компатибилни драм јединици?
OEM барабаните се производи на производителот на штоперот за гарантирана компатибилност, додека компатибилните единици се поефтини алтернативи со можно варијабилност во перформансите.